

"Smart Doll is a 60cm tall articulated fashion doll designed by Danny Choo and manufactured in Japan by Culture Japan.
The first Smart Doll is modeled after the Japan tourism mascot Mirai Suenaga and comes in two flavors - Manual and Automatic.
The Manual version is powered by your imagination thanks to the fully articulate and sturdy internal frame called Mirai Frame.
The Automatic version is powered by electricity - a robotic doll that not only can move on its own but also comes with functionality to inform you when you get notifications from Twitter, Facebook or updates from your Mail and Calendar."
HOW TO BUY
I'm aware that many folks who have arrived on this page are interested in buying a Smart Doll but before you do decide to buy - please read through this whole page - don't skip anything!
As a consumer, I know how disappointing it can be to receive something in the post and discover that I just paid a ton of moolah for something that was completely different from what I expected.
The purpose of this post is to outline what the product is and set expectations for all so that there are no surprises - and remember that the only version available now is the non-robotic Manual Version.
Having said that, I'm also aware that there are some folks out there who want to get their hands on a Smart Doll ASAP - if thats you then the cart is here!
WEB REVAMP
if you are a regular reader of dannychoo.com, you will notice that the Smart Doll pages use a different template. For now you cant do photo annotations on them either.
All photos are HD sized so should make nice wallpaper. They also resize with the width of the browser.
You can comment as usual though.
![]()
Why Smart Doll?
I would think that most humans have at least one passion that they live before they kick the bucket - something that drives them to wake up every day and look forward to breaking through the barriers that are part and parcel of trying to reach a goal.
Up until now, to be honest I didn't feel that I achieved much in life. While one of the best things about my job is that I get to make comrades around the world, I've always felt that I haven't done anything significant - up until now. Smart Doll changes everything.
Now when the Apes take over after the apocalypse, they can dig up a Smart Doll - they can dig up something physical that I created ^^;
Many folks around me seem to prefer that I stayed a blogger but I didn't want to die just writing articles all my life - I wanted to create something special and I believe that many humans are the same - they want to create.
Dont get me wrong though - I do think that blogging (which I still do from time to time ^^;) is a creative process and I have been able to connect to folks around the world through my writings but at the end of the day its all 1's and 0's in the cloud - a mega magnetic pulse could wipe out all forms of data during that apocalypse meaning no more blog - a physical item however is very different - just check out the museums to see what they dug up so far!
From the time of the cavemen who had been creating paintings on the walls of their caves and even making dolls - I feel that I was destined to create something before I die which will could be anytime between now and 30 - 40 years time.
If I do live until I'm 70 or 80, it means that I've already lived for more than half of my life. While I couldn't really do anything about my first 10 years or so being brought up in a foster home, I feel that I've been able to take back my life after discovering Japanese Culture which has enabled me to produce something that I believe will change not only the doll market but also the way we think about robotics and communications - then eventually going beyond that and changing the world.
But why dolls?
I discovered the 60cm genre of dolls through a product called "Dollfie Dream" and was amazed at not only the quality and detail but also the cuteness too!
I sought to get hold of one but it wasn't easy convincing our Finance Director (wife) especially when they cost about 60,000 JPY. I had no idea why they cost so much - until I started to make my own - the unit costs of such a product are really high ><
I was so happy that I got to meet the Managing Director at Volks last year!
Through writing and sharing my interests on the 60cm genre of dolls, I have been able to connect with new comrades around the world. I see these dolls as a social media which brings complete strangers together. While I do love existing products on the market, I really wanted to create my own doll which not only reflects my vision of design but also introduces some new concepts too.
In particular, I wanted to have my mascot character Mirai Suenaga made into this genre of doll so I set about learning all the manufacturing processes involved through Google-sensei, connect with folks in the industry and bootstrapped the Smart Doll project mainly through the sales of Mirai Suenaga merchandise.
My vision is to change the global fashion doll market with a genre of doll that most of the planet has not seen before and believe that when they do see it - many will want it.
From now I will be making our own characters (next is Kizuna Yumeno followed by Chitose Shirasawa) and have no plans on developing any anime or game licensed models so if none of my girls tickle your fancy then I recommend you keep an eye on Dollfie Dream as they develop a load of cute anime and game characters.
![]()


But before we continue, here are some of my fave photos of Mirai who makes a great photography companion!

Smart Doll Manual Version (also abbreviated as SDMV) is the non-robotic version of Smart Doll.
Instead of electronics, the body houses a proprietary designed frame on the inside called Mirai Frame which allows for a wide range of articulation and poses just like an action figure.

The Internal Skeleton for Smart Doll Manual Version
![]()
Designed by Noriaki Miyata and myself, Mirai Frame is the skeleton used inside the Manual Version of Smart Doll. Mirai Frame is made from POM (Polyoxymethylene) which is recognized for its high strength, hardness and rigidity.
The frame comes with a hole called Smart Support Socket located just above the base of the spine which not only enables dynamic mid-air poses with the Smart Air Stand (sold seperately) but also provides additional stability via the telescopic stand that comes included with Smart Doll.
The spine employs the Jeton Joint which not only enables a wide range of movement but is also lightweight.
The injection mold for Mirai Frame is crafted in Yamagata and Tokyo while the actual injection molding is done in Tokyo by Muto Molding.
I do plan on selling just the frame as a standalone product in the future but for now I'm focusing on the Smart Doll 001: Mirai Suenaga.

Smart Doll Automatic Version is the robotic version of Smart Doll. Instead of Mirai Frame, the internals are made up of a casing which houses the servo motors and electronics that enable Smart Doll to move her limbs and head automatically through sending commands via an Android or iOS enabled mobile device.
Smart Doll Automatic Version is not only about robotics but also about computing and telecommunications.
The Automatic Version is not due out until end of 2014. I'm not accepting pre-orders until the product is ready.
For now - an old video of her in action at YouTube.

Mirai Smart Body is the outer shell that houses either the Mirai Frame for the Manual Version or the robotic components for the Automatic Version - the appearance of both are identical.
![]()
I designed the body of Smart Doll to reflect my vision of how I thought a fashion doll body should look like which is why the proportions are different from other dolls in the same genre.
Smart Doll has long legs and wide hips but the Small Bust still ended up being on the large side><
The dimension chart for Smart Doll can be found on Flickr.
I'm currently working on a completely new fashion brand for Smart Doll but while I get that up and running, you can shop for doll clothes at some of the following online stores.
For custom made items you can contact one of the Smart Doll Official Tailors - remember to tell them what bust size you have and they will design something to fit your Mirai.

Designed to not only look good but to pose good too

One of the most challenging things about designing a doll is to decide on a balance between looks and poseability.
I initially designed the Smart Doll body to look smexy as I felt that it was an important factor for a fashion doll. The design was done using software such as ZBrush and then printed out on a 3D printer. After the parts were printed, I discovered that the looks of the body hindered the articulation so from there I slowly modified the design of the body to create a balance between looking good and being articulate.
I do plan on selling just the blank Smart Body on its own in the future but am now just focusing on the Smart Doll 001:Mirai Suenaga Manual Version.
Spare body parts are also in the pipeline but not available now. And yes various hand parts are in the making too.

There are a few new concepts that Smart Doll introduces to this genre of doll - one is the Triple Axis Joint. As you can see from the design of the foot - there are 3 axes which enables Smart Doll to stand firmly on the ground when her feet are slightly apart without this joint design, only the edges of her feet would touch the ground.
The arms play a very important role in expression when posing so it was also important that the wrists had a Triple Axis Joint too. You will notice a little pocket in the hand joint - this is actually there for folks who want to place a magnet inside for holding oddly shaped accessories.

Not as many cup sizes as Starbucks but just enough
![]()
Many dolls in the same genre traditionally are designed with a joint right in the middle of the waist which I wasn't too keen on.
I designed Smart Doll to have the waist joint below and behind the bust which follows the natural form of the boobies and looks particularly good with the Medium and Large busts.
Mirai has a modest sized bust which is why I originally designed her with the L size bust - but she didn't look that great with her rosebuds showing through her T-shirt - she would get embarrassed when out n about.
For this reason Mirai ships with the Small bust which does not have rosebuds but looks greeeaaaaat with a T-shirt!
In the photo above we can see the Medium bust on the left, Small bust in the middle and Large bust on the right. The Medium and Large busts look similar but the Large has more volume on the sides.
The Medium and Large look great in a bikini or when in birthday suit mode but don't look too good in a T-shirt as the rosebuds look like they are going to poke somebody's eye out.
The arms and head are designed to be easily removed by the owner - once removed, the busts become interchangeable.

The Smart Support Socket is a step out of the comfort zone and introduces a new way of not only supporting the Smart Doll body - but also providing extensibility for accessories and robotics in the future.

Say sayonara to bulky "portable" doll stands
![]()
Mirai Suenaga Smart Doll can stand on her own two feet without additional aid but for extra support on uneven surfaces, I have included a portable telescopic stand - together with her two feet, the three points of support provides strong stability when taking photos outdoors or in windy conditions.
Up until now, doll stands have been large, heavy, clumsy to handle and make a beautiful doll look....not so good as they usually provide support by a visible "C" shape around the waist or ankle or even by a saddle below the crotch.
Not only can the telescopic stand fold up and fit in your pocket, when attached to the Smart Support Socket, depending on the angle you take your photos - either one of the legs hide the stand so you can't even see it.

For the home or office interior and great for event display.
![]()
This is the made in Japan Smart Air Stand which I'm still currently developing - I would say that this is the world's sturdiest doll stand ever! It fits into the Smart Support Socket and you can adjust the height for those mid air poses or just have Mirai do a skipping pose on your table.
I'm designing it so that you can even attach the main pole to a camera tripod to take photos of Mirai when you are out n about. The color of the base turned out a bit weird so am having a new sample made. Once I approve it then we mass produce it - should be ready for sale mid July 2014.

I'm extremely pleased with the quality of the Smart Doll resin eyes and I think you are going to like them too - they are incredibly clear! Mirai's resin eyes are all handmade in Japan.

Mirai Smart Doll comes with an interchangeable heat resistant wig - this means you can not only style the hair but change it too which gives Mirai a completely different look and feel. We have already pleated the braids too so you dont have to.
I will be developing our own line of wigs soon but for the meantime you can look for 3rd party wigs which have a head circumference of 21cm.

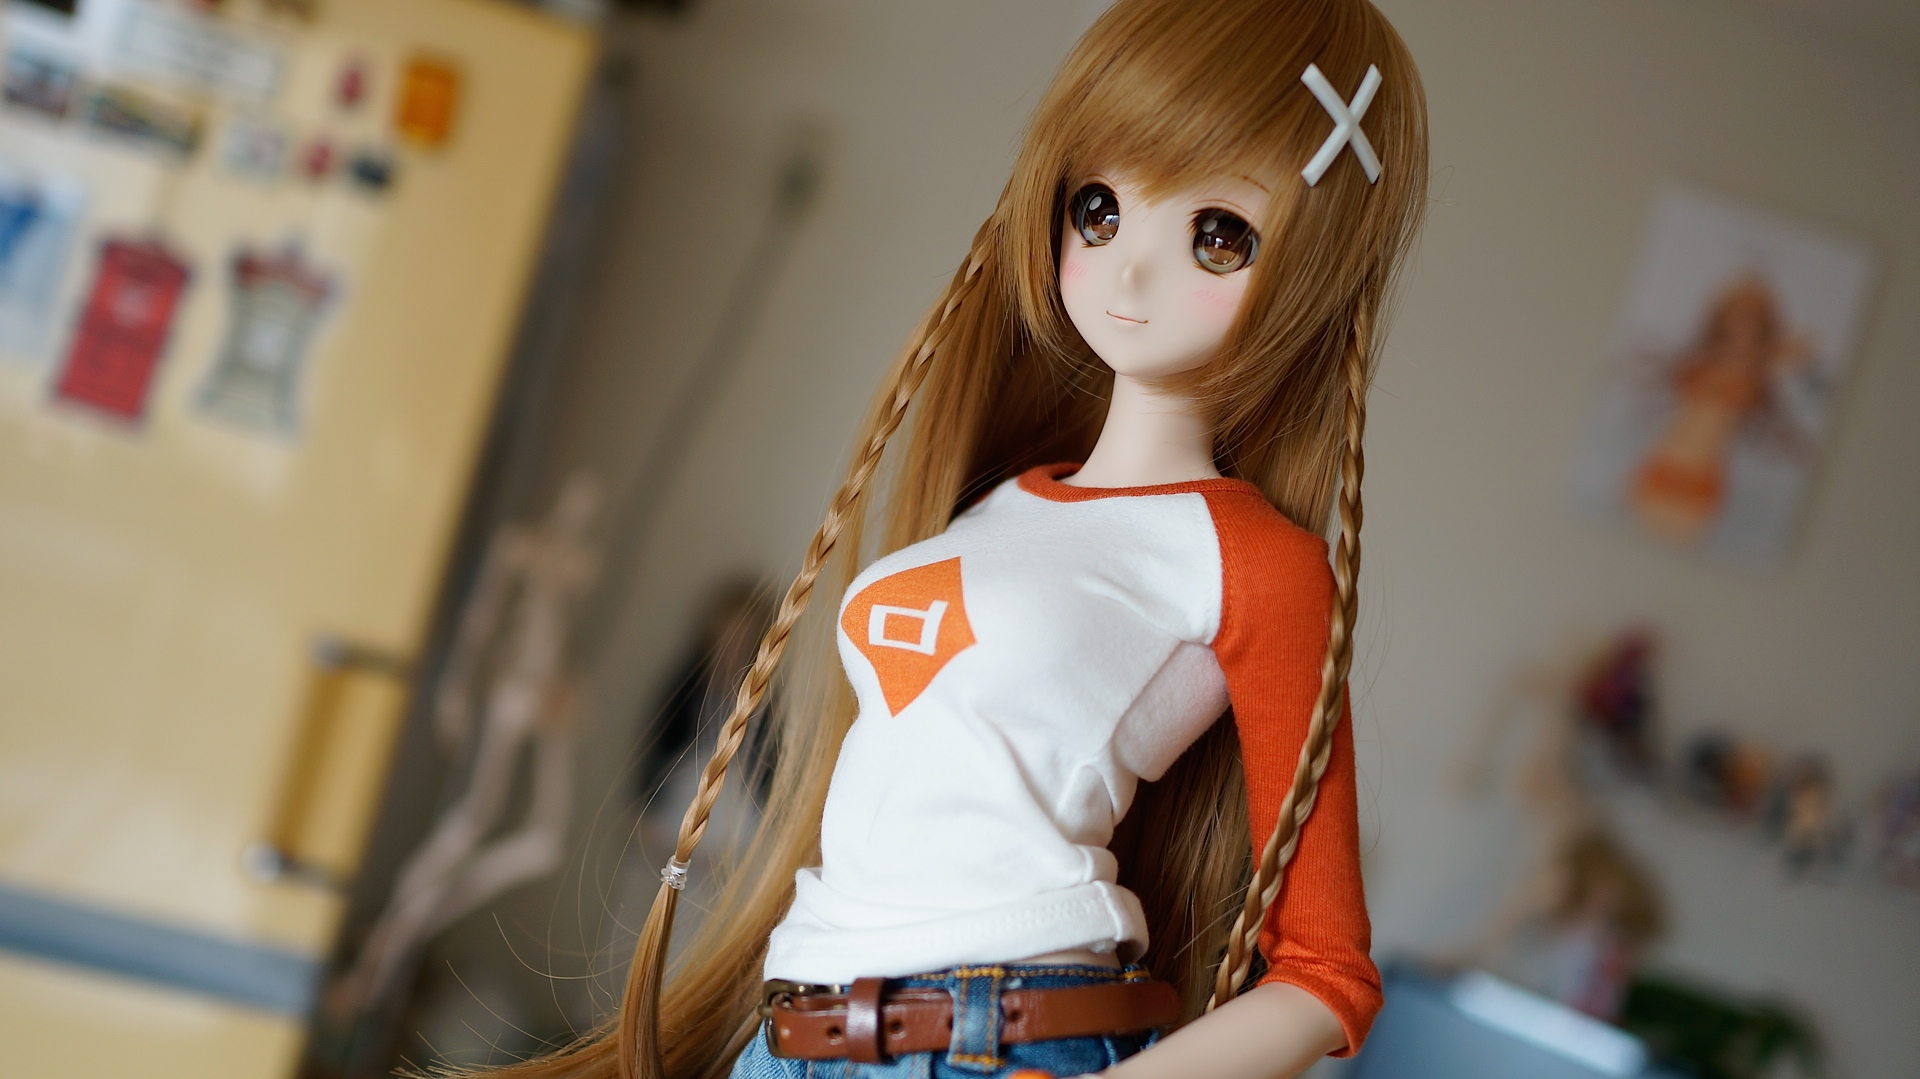
Ready to go with Mirai's casual wear
![]()
I originally was going to ship Mirai in her Summer school uniform but what I discovered is that the majority of folks seem prefer their girls to be wearing something casual instead.
It did not make sense that the majority of folks would pay for the (usually) anime or game default uniform that they didn't really want and end up selling it - then have a hard time hunting and paying for casual wear.
I like Mirai's Summer uniform but I also prefer casual wear which is why I've decided to have the default model in Mirai's casual jeans and T-shirt.
What you see in this photo is the actual product and not samples - included with Mirai is a beanie, T-shirt, jeans, underwear, socks, shoes, magnetic hairclip and the telescopic stand.

Product photos are of the actual product - not of enhanced prototypes or touched up images
![]()
I didn't take pre-orders for Smart Doll until I could show you the actual product as I wanted to set expectations correctly.
As a consumer, I know how disappointing it can be to pre-order something based on the looks of a prototype and then finding out that it looks nothing like what you was lead to believe.
Product photos are not photoshopped nor are products enhanced in anyway to make them look better than they actually are. I currently use the SONY RX1 to take most of the key images.
This is a photo of the jeans that come with Mirai - being hung up to dry after being given the worn look and feel.

Smart Doll 001 is modeled after Mirai Suenaga - the mascot character for Culture Japan and heroine for the story Mirai Millennium.
Since her creation by Danny Choo back in 2007, Mirai has gained a wide following around the world.
Domestically in Japan, Mirai has collaborated with companies such as Good Smile Company, Bushiroad, Nitroplus, JC Staff, King Records, Kadokawa and more.
Internationally, Mirai has collaborated with Kinokuniya, Air Asia, Lawson, Penang Tourism and has also become Malaysia’s IC card called Touch N Go.
In 2013, Mirai became an official mascot for Japan Tourism and by early 2014 she had her own racing team which will race GT tracks worldwide.
Read more about Mirai Suenaga »


Designed, Manufactured and Assembled in Japan
![]()
While there is one main reason to manufacture the Smart Doll body overseas (cheaper costs), there are a plethora of reasons why I decided to manufacture in Japan - despite the higher costs.
I work with vendors located throughout Japan on the various parts of the Smart Doll body and while the costs are on the high side, the workmanship over here is pretty much top notch meaning that I don't need to spend all my time traveling to somewhere overseas to watch the production line like a hawk.
I thought I'd talk a little bit about the production process to not only give you a better understanding of Smart Doll but also share techniques involved so that others can use the knowledge to make stuff too.
This section may be boring to some but it's important you know as much as possible about a product that you may be interested in forking out a ton of moolah on.

Design & Mold Preparation
1. The software we use to sculpt the body is a 3D software package called ZBrush.
2. ZBrush data is then imported into 3D Max for various tweaks and to make sure everything moves and fits together.
3. We used two different types of CAD packages for the frame - SolidWorks and Pro/ENGINEER.
4. The face is initially mirrored but then manually tweaked so that its not unnaturally symmetrical.
5. We use a software called Netfabb to prepare the data for printing.
6. Back then, I used a 3D printing service in Tokyo called Digimode - all I needed to do was to submit my STL data and a few days later they would send back the parts.
7. Digimode used the Envisiontec Ultra rapid prototyping machine to print the parts.
8. The bits that you see attached to the bottom of the bust are called Support Structures which need to be snapped off and sanded down.
9. This is the first time I see my creation as a whole ^o^ The next step is discussed in the following section "Soft Vinyl Mold Preparation."
10. Now that the body shell data is complete, we need to tweak the internal frame data based on findings from our 3D printouts.
11. We used a 3D printer that printed in nylon as it was the optimum material needed to see how joints rubbed against and fitted with each other.
12. We tweak the data based on the 3D printouts and repeat the process a zillion times until we feel the design is optimum.
13. The frame is going to be injection molded so we need to prepare the mold data. This process was way more complex than I imagined and involved knowledge of material flow, cooling levels, wrinkling, warpage, mold temperature, injection pressure etc etc - all that and more just to know where to put the pieces in the mold and where to attach the runner gates.
14. After a while, we managed to get our own 3D printer which we started to use for production (review here). Just like before, we prepare some STL data of the part to be printed and load it into the printer software called PreForm.
15. Preparation of the printer by pouring in the clear resin.
16. An ultraviolet laser beams up from inside the printer and hits the bottom of the tank to cure the resin.
17. This hand can take between 2 and 6 hours depending on the layer thickness setting.
18. The printed parts are then removed from the Build Platform.
19. To use this printout for our doll production, I cut off the Support Structures and then sand down the surface to prepare it for the next step which is Casting. My goal is to create a copper mold used for mass production of the soft vinyl shell.
20. Photo together with Miyata Noriaki who I designed the frame with.

Soft Vinyl Mold Preparation
Continuing on from the previous section, now we look at how the molds are made for the soft vinyl outer shell.
1. Taking the 3D printouts of the body parts in the previous section, the next step is to make silicone molds which we will then use to make wax duplicates of the pieces. We then tie the two pieces of mold back together again and then pour in some hot wax.
2. Once the wax has cured, we can remove it from the silicon mold. Notice the wrist has a funnel attached - this is to enable us to pour in the soft vinyl when this eventually becomes a mold.
3. As soon as the wax copy is taken out of the silicone, the surfaces are rough and need to be polished down - if there are blemishes on the wax then it will end up being in the mold meaning anything made from the mold will also inherit blemishes.
4. Next up is preparing to make the wax copy into a mold and this is done in a process called Electroforming. Each part is first sprayed with graphite-based ink that makes it electrically conductive.
5. Each piece is has copper wire tied to it and hugh up to dry.
6. The wax copy is then dipped into an electrolytic bath. Deposits of copper then build up on the conductive surface to replicate the surface atom by atom.
7. Depending on the size of the wax piece, it can take a week for the copper to build up - this is the end result after the wax inside has been melted and poured away.
8. The copper molds are then welded on to a plate of metal called a "Frypan."
9. We currently only have one set of molds but discovered that we need to increase our mold count as we can't keep up with demands with this single set ><
10. The manufacturing process used to mold the body shell is called "Slush Casting." Here liquid vinyl is poured into one of the molds. The vinyl we use is the same material as other soft vinyl dolls on the market and does not pose any general risk to human health unless you eat or suck it - no sucking!
11. When the liquid vinyl is poured into the copper molds, air pockets get trapped in the liquid which must be removed - we do that by using a centrifugal separator which spins round for 30 seconds or so.
12. Even still, air pockets may be stubborn so they need to be removed using brute force - introducing a deaerator which removes all trace of oxygen from inside the chamber where the mold is placed.
13. The mold is the placed in a bath of oil which has been heated up to about 180 - 190 Celsius. The thickness of the doll piece is determined by how long you leave the mold in the oil. The heat penetrates through the mold and heats up the vinyl closest to the inner wall of the mold.
14. The copper mold is then placed into a cold water bath to cool down.
15. Next we need to pull the part out of the mold - pull to early and the part could end up being stretched - pull too late and it could be too hard to pull out or end up being damaged.
16. The mold has hoops attached - a slight change in the angle of the hoops affects the quality of the pull.
17. And this a hand freshly pulled from the mold - we then need to cut off the flash which is the funnel attached to it.
18. Together with the boss of mold maker Kamijo who have won awards for the quality of their molds.
19. This has nothing to do with soft vinyl but wanted to show you how we made the frame prototypes at one stage - we would use 3D printouts and copy them using silicone molds.
20. Some resin frame parts ready to be cut off the runners.

Continuing from the Design & Mold Preparation section, we are ready to make the molds used for the injection molding for the frame - the most complex thing I've ever worked on ><
Injection Mold Preparation
1. I chose to work with a Japanese company called Muto based in Tokyo - this is our first meeting discussing part layouts, issues and wotnot. The process of making an injection mold is complex and we had to modify many parts to avoid warpage, wrinkling etc.
2. Once we are ready to make the molds, I'm off to inspect and oversee the making of the molds at Muto's Shinjo factory in the Yamagata prefecture.
3. Injection molds are huge! They are also expensive too >< Never have I received an invoice for 160,000 USD before ^^; But after making the mold, I understand why it costs so much - you are not just paying for 2 pieces of metal but paying for the knowhow involved into placement of the parts in the mold.
4. Our mold taking shape - the carving process takes a few weeks.
5. The holes you see in the mold are for ejector pins which push the part out of the mold after the molding process. For this reason many products have little circles which are usually placed in not-so-visible areas.
6. We make the mold in pieces so that its easy to change parts in the future. Parts which are tube shaped that contain a shaft need to be put at the side of the mold and are called "Slide" because an extra mold part is slid in from the side.
7. Our injection mold is complete! Now I need to order the pellets.
8. Before ordering the pellets, I need to choose the color. I send off a sample of the outer shell and get back a set of color plates which have been made especially to match my requirements.
9. For the spine, I use a product called JETON which is a joint that already exists on the market and are used as a frame for dolls and plushies. I use those color plates to order some JETON joints in the same color.
10. Color matching is a difficult process as colors looks different in varying lighting conditions.
11. My pellets have come back from mixing and have been placed in the injection molding machine. Here they are heated to high temperatures and injected into the mold which has also been heated up to receive the material.
12. Once the material has been injected into the mold, the mold opens up and the parts are pushed out by the ejector pins.
13. The size of each part on the runner changes depending on the values used during the injection molding process which include things like temperature, pressure, speed and so on.
14. So even though we have the mold made to spec, we then need to tweak values over the next few months to make sure that all frame parts fit together nicely.
15. We do thousands of tests which unfortunately does involve wastage but is all part of the process of making all the parts fit perfectly. All test parts are recycled according to Japanese rules and regulations.
16. To see if the parts fit together properly, we need to assemble several hundred frames over a period of a few months.
17. We use grease on all joints to ensure smooth but rigid movement. Initially from time to time the grease may seep out to the surface of the wrist, ankle or elbow joint - if that happens then just blob it with some tissue.
18. Its not just the assembly of the frame we need to do - we also need to put the frame in the outer shell to see if everything fits together properly. Through this process we had to change a few of the outer shell molds.
19. The very first frame batch to come out of the mold is known as T1. Everytime we make a change to the frame we increment that number. We finalized the frame at T7.
20. Mirai Frame is made from POM (Polyoxymethylene) which is recognized for its high strength, hardness and rigidity.
I do plan to sell the frame standalone which is why I designed some hands and a head for it - the hands and head only come with the standalone frame.

Face & Eye Development
A large proportion of the entire production process is spent on making sure the face looks cute!
1. The face design is based on an illustration of Mirai Suenaga by Japanese illustrator Iizuki Tasuku-sensei.
2. The most important part of the face are the eyes so I wanted them to be something really special. Slight changes in gradient, highlight position and color give a totally different look and feel.
3. The eye design is made in Photoshop.
4. Its important to see how the different variations look so we print all the pupils out on photographic paper and cut each pupil out.
5. A mold needs to be prepared and we do that using silicone.
6. A hardening agent being poured into the silicone.
7. Clear resin is poured into the silicone mold and the pupils are placed on the resin face down. We then pour in white resin to finish off the process.
8. We repeatedly make prototypes until I'm happy with the look and feel.
9. A slight change in color of the eyes affect the entire look and feel of the face.
10. Now we take a look at how the faces are painted. Initially we make a master prototype - for this I call on the talents of Ronronshuka-san.
11. I have several faces painted in slightly different variations and choose one to modify.
12. For sending instructions regarding all aspects of doll production, I use monosnap and Fireworks.
13. Once I have a head that I am completely happy with, we need to make paint masks. This is done using a process called electroplating where the head is plated with copper to form a mask - the mask is then etched with the same design as the face.
14. The number of face masks depends on the number of colors needed.
15. The mask is placed on the head like so and sprayed. The mask means that we can paint the faces quicker but is still a very manual job and not printed by machines like figures.
16. Before we send off the heads to be painted, we need to cut out the eye holes and the flash from the top of the head. The eye holes then need to be sanded down on the inside to make sure they conform to the contour of the eyes.
17. Some of the Mirai heads in the process of being spray painted. We actually also paint the inside of the eye sockets too. This is all done in the Katsushika ward in Tokyo.
18. When the painted heads come back, I need to scrutinize and check them. If paintwork is slightly off then I will send them back where they will be wiped down with thinner and painted again. I do keep some for production or display purposes though.
19. The eyes need to be placed into the head and we do that by using a load of Blu-tac. We use Blu-tac which makes it easy for you to change the eyes - we will be releasing our own brand of doll eyes in the future. You can also use third party eyes too and should choose ones which are 22mm wide. At this stage we also put in the magnet used to hold Mirai's hair clip in place.
The eyes are placed in a way so that they ever so slightly look inwards as I think she looks cuter that way ^^; If you don't like cross eye girls then you can always adjust the eyes yourself though.
20. Face complete and I think she looks really cute!

Wig & Hairclip Development
Being a fashion doll, Mirai comes with a removable wig so that you can use our brand of wigs (which we are developing now) or third party wigs. Mirai has a small head so the wig circumference you should be looking for is 21cm.
1. To mass produce wigs I first need a prototype - I find a third party wig which is styled to my liking - I then take photos of it and use the usual monosnapping to provide instructions to the vendor who makes the wigs.
2. Korea has a large established resin doll industry with many vendors that create high quality wigs and apparel. I learned Korean together with Japanese when I was at university but never thought that being able to speak Korean would become such an essential part of our business ^^
Anyway, here are some synthetic fibers being prepared for stitching.
3. The synthetic fiber is then stitched on a thin ribbon.
4. The ribbons are then stitched to a head cap.
5. Once the headcap is ready, all the synthetic fibers are standing up which makes our Mirai-chan look like a mad woman - the hair is styled using hot steam which shoots out from this black tube. Once thats done, Mirai has her braids hand pleated.
6. Once a sample is ready, I would provide feedback on what I want to change - this process is repeated about 5 times until I'm happy ^^;
7. I chose to use heat resistant synthetic fibers which means you can even style her hair using one of those hot iron hair curlers.
8. Next up is the development of the hairclip. I left this until the last because I could not think if a good idea to affix the clip to Mirai's head without ruffling the hair too much.
9. Once I have decided on a size for the clip, I make it in 3D software.
10. I then print a version using our 3D printer to check the size.
11. The size was fine so the next step is to make the hair clip in the same material as the final product. I do this by sending data off to Protomold.
12. I initially thought I could attach a clip like this but it was a pain fixing it to the side of the head and there was a risk of scratching the side of the face.
13. We came up with the idea of using strong magnets instead so we modified the data and used Protomold again to do the mass production.
14. And here is the final product with magnet fixed in place.
15. Mirai-chan and her iconic hair clip - it can fall off easily so I would advise that you remove the clip when you are out n about and attach it just before you take photos.
16. The magnet is strong enough for you to attach the clip to the side of the head through her beanie.
17. The removable wig means that you get to customize and make your very own Mirai ^^
18. At the moment we are developing a wide range of wigs.
19. The new brand of wigs will be called "Wiggly Wigs."
20. I was joking about the "Wiggly Wig" naming. This is Mirai with shoulder length hair which I really like!

Apparel & Shoe Development
All apparel items are designed by myself with the aid of some talented doll seamstresses - in particular Puppy Dolls and Murasaki.me who are both official Smart Doll Tailors. If you need anything original made for your Smart Doll then contact either or both!
1. This is the set of casual clothes that Mirai comes with - this is a photo of the actual product and not of prototypes.
2. The most challenging thing about making the apparel items was color and material - one of the reasons is because they are not always available and come and go with seasons. Here I am hunting for material at Tomato in Tokyo.
3. Working on T-shirt tweaks. The T-shirt was designed together with Murasaki.me who also sells the same design for various dolls.
4. Mirai-chan came with me to Seoul to oversee some of the production.
5. I think you are really going to like the jeans - I designed them to be bell bottomed and they make Mirai look great! PuppyDolls helped out with the prototypes.
6. The jeans are given a worn look and feel - here they are being hung up to dry after bleaching.
7. Mirai ready to head out in her casual gear! Ah - the belt in that photo is not included ^^ I thought a belt would look nice but it makes the T-shirt look short compared to the length of the legs so I removed it.
8. For the development of the shoes we also use the aid of 3D prototyping technologies. To make shoes we need a "Last" which is the mold in the shape of a foot - we make this in 3D software.
9. The Last printed on our 3D printer.
10. The Lasts sanded down after a lick of primer.
11. Here are the final Lasts ready to be duplicated - for this we use the services of RC Berg.
12. RC Berg take my original prototype and duplicate it in silicone - this enables us to make loads of shoes - at the moment our capacity is 400 pairs a month but are in the process of ramping up.
13. Our shoes are made using the same processes as making human shoes - I'm extremely pleased with the quality.
14. I manage production of the shoes in Malaysia at studios of my fathers comrades.
15. For folks who are not familiar, my father makes shoes and goes about by the name of Datuk Jimmy Choo. When I was younger I also made shoes in his studio for folks like the late Lady Diana.
While we didn't end up working together on human sized shoes - we did eventually but on smaller sized shoes - for dolls ^^
16. I'm also working on a new brand of shoes for dolls - here are samples and a taster of what's to come.
17. I really need to hire somebody full time to manage all the apparel design and production but for the meantime I'm doing everything myself. Here I'm working on the Summer Uniform which has been a challenge as its based on the design of an illustration that has Anime physics ^^;
18. Some samples of the Summer Uniform.
19. The orange shimapan underwear that comes with the Summer Uniform.
20. Mirai with her Summer Uniform - the bust attached here is Large but I will be first releasing the uniform for the Small bust.

Assembly and Shipping
And there is more ^^;
1. All assembly and shipping is done at my house and when the injection molded frames arrive they do so in huge boxes that take up the whole of the first floor ><
2. This is what it looks like inside the box - 1 frame is made up of two sets of runners.
3. Each set of frames need to be inspected for blemishes.
4. The boxes take up way too much space so we need to reduce their mass by bagging all the frame parts in separate bags. We do this using trays from IKEA that we call Sorting Trays.
5. We break the pieces into the tray by hand and cut off the gates during assembly.
6. Once the frame parts are bagged they take up much less space and the production line has become a wee bit more efficient.
7. Next up is assembly of the frame - folks who build Gundam may like this task. The frame does use screws for extra strength around the large joints but most of it is snap fit.
The assembly process involves greasing various parts, snipping the gates and in cases sanding down gate marks too.
8. Here you can see that some of the parts are shiny and others are not - I got the injection mold sand blasted for areas that I wanted to be matte which are the wrist, elbow and ankle joints - the reason is so that they can match the soft vinyl shell as much as possible which is also matte.
9. And once the frame is assembled we stick it back in the same bag.
10. Now we look at preparation of the soft vinyl - here are some parts back from the factory in Katsushika Ward.
11. The first thing we need to do is to check the parts. I mentioned air pockets in one of the sections above - I reject parts which have large air pockets but approve parts which may have extremely small ones in areas which are not so noticeable - but this is rare and may be a single air pocket 0.02mm wide at the back of the bust for example - folks who prefer a spic n span surface should avoid purchasing Smart Doll.
I also reject parts which have wrinkles or large black dots - but approve the dots when they look like small beauty marks as I think they are kinda cute and we humans have them anyway - folks who prefer a spic n span surface should avoid purchasing Smart Doll.
I generally don't approve those black dots when they look like a spec of dust or are located on the nose or obvious part of the face. The black dots look like beauty spots when they are just under the surface of the material.
The black dots are still a mystery to folks in the industry who do slush casting but I think that its god doing his work to beautify your Mirai ^^; Heck there are even folks who purposely add beauty spots to their body.
12. Here are some parts which have been rejected for some reason or another. When this happens we need to get these parts made again and repeat the process. While this process is important - it's also particularly time consuming.
13. Once we have a set of clean parts, we need to cut off the flash - this is done by heating up the soft vinyl parts in a heat box and then using a craft knife to do the cutting by hand. It may look easy but I want the edges to look like they have been cut by a machine and so far there is only me and another member of staff that can do this.
The difficult thing is that there is no cutting mat to rest the part on - you have to cut in mid air.
If you think you can cut like a machine then I am interested in hiring you full time!
14. Here are some freshly cut busts - the Medium Bust on the left and large Bust on the right - the Large Bust has more volume on the sides.
15. Next we need to put the frame inside the soft vinyl body parts. This is done by heating up the soft vinyl parts again in the heat box. The final step is to snap in the cover of the Smart Support Socket located at the back of the torso.
16. Here are some completed Smart Bodies.
17. The telescopic stand has to also be assembled and we do this by using our magic friend Blu-tac. I used Blu-tac because some folks may want to customize the stand plug and it didn't make sense to glue it tight.
18. The next thing to do is to dress the dolls. The jeans are a bit of a tight fit because I really wanted to show off her bodyline. The shoes are a bit tight too because I didn't want them to fall off when you carried her around.
19. Nearly there! Next the boxes have to be assembled and the various postcards put inside the white envelope which also acts as the box logo. The design of the box will probably change over time.
20. Final step is packing and shipping out by EMS. As our own E-commerce platform is not ready yet, manual processing paypal orders at the moment is currently a bottleneck that we need to improve.
Packaging may be different from the ones of her you see in the clear box which was originally designed to be displayed at stores. We are constantly improving the package and packing methods based on customer feedback - we need to also do this in a way so that it does not increase weight for shipping.
Anyway, as you can see quite a bit of work is involved in bringing you Mirai. As we have just started, our costs are extremely high which is why our unit costs are high too but as we improve our workflow and constantly seek ways to reduce costs, I will be able to pass those savings back onto the customer.

![]()
Mirai Maintenance (PLEASE READ!)
This section covers information for new Smart Doll owners and for folks considering purchasing one too.
I have heard many folks say that it looks difficult to look after a doll but that really depends on what plans you have in store for Mirai. If you are going to have her sit or stand on your desk and take her out from time to time then there is not much to do - just a few things to take note of.
If you plan to be taking a ton of photos and doing a load of customizations then there are a few more things that you should take note of.
If you have just received your Mirai and think something may be broken or odd then first read through the points below. If you think that none of the below applies to you then contact me at support@smartdoll.jp and I will get back to you usually within 24 hours. You must let me know within 2 weeks of receiving Mirai to be entitled to a replacement or refund if something is broken.
I cant do refunds for the reason of "I don't like her" so make sure you have read though this whole page or wait for reviews of other folks before deciding to buy.
Skin surface
1. Each Smart Doll is hand made in Japan - while they all look alike - they are actually ever so slightly different - the makeup on the face may be slightly different from others and she may also have beauty marks in different places too - none of these said points are defects and is a result of each doll being hand crafted as opposed to being machine made.
2. Due to the nature of the soft vinyl material that Mirai is made of, dark fabric colors will stain on her skin so do not dress her in anything dark.
3. Mirai does come in jeans and a T-shirt with red sleeves but I tested the fabric on her standing for a few months with no trace of color stains.
I did however do a test on a Mirai sitting down for a few months too and there was a small patch of jean stain on the thigh near the crotch area and figured that this was due to the pressure between the thigh and crotch area so don't have her sitting down for prolonged period of time. I did manage to wipe the stain off though.
If you remove her clothes as soon as you get her and find color stains then just mail me at support@smartdoll.jp and I will replace her for you by shipping a nekkid one to you. But my Mirai's did not stain after leaving her dressed standing up and don't think there should be a problem - no Smart Doll customers have had this problem (just ask them!) so far but if they eventually do I will update this section.
4. I mentioned this above in the production section but its important so I will mention it again - there may be a small (usually 0.01 mm wide) black dot just beneath the surface of some body parts which I have approved only if they look like beauty marks and not spots of dirt. If a beauty mark is located around the edges of the face that would be covered by the wig then I approve them - folks who prefer a spic n span surface should avoid purchasing Smart Doll.
5. I mentioned air pockets in the production sections above - I reject parts which have large air pockets but approve parts which may have extremely small ones in areas which are not so noticeable - but this is rare and may be a single air pocket 0.02mm wide at the back of the bust for example - folks who prefer a spic n span surface should avoid purchasing Smart Doll.
6. Paint thinner is your friend. It works wonders in removing dirt from the surface of the skin. Just soak a cotton bud and use it to gently wipe away any dirt that got on the skin.
Posing
1. While the frame is made of sturdy POM and the outer shell of soft vinyl, Mirai is still a delicate girl so please be gentle with her and don't put excessive force on any part of her body. Remember that her legs bend at the knees at only 90°. I designed the knees this way because I didn't want her knee joints to split open just to fold her legs 180°.
2. The jeans that come with Mirai are a bit of a tight fit - the reason is because I designed the jeans to show off her body line and long legs ^^;
When you want to sit her down, you may need to grasp her thighs and roll the jeans back and forth a bit upwards towards the hips - this makes it easier to let her sit down. Also, make sure her underwear is above the jean button to prevent the button pushing into her waist and leaving a mark.
3. The outer shell is made of soft vinyl which is a Shape-memory polymer. If Mirai wears tight clothes or you sit her down on a flat surface for prolonged periods of time, her bottom cheeks for example may become flat - all you need to do is to heat up the surface with a dryer and the piece will return to its original shape.
4. The term "Reset" in the Smart Doll world means to reset the joints after posing her. Have a look at the above image - the elbow joint is designed to move down when the elbow bends but you need to push it back into place after to "Reset" it.
5. The shoulder blades are designed to move for an extra degree of articulation but should also be Reset after posing - if you don't reset then it will look like Mirai is slouching.
To Reset the shoulder blades all you need to do is to hold and press Mirai's shoulders to make sure the shoulder blades are in a vertical position - also make sure the shoulder blades are the right way up as shown in the photo above.
6. Wrist joints should also be reset - make sure you push the wrist joint all the way into the forearm shell to leave no gaps.
7. If the head seems loose, its either because it moved up along the neck joint or because the bust was pushed down too far - both need to be reset. Hold the neck firmly and move upwards to straighten the spine. Always make sure the neck is in an upright position or it looks like Mirai is slouching and slouching is bad!
8. To change bust sizes you need to remove the head and arms first. Hold the bust by the neck with one hand and grab the shoulder arm with the other - then pull the arm off. Once you have done this to the other arm, remove the head by grasping and gently pulling it off - you can now remove the bust and replace it with another size.
9. The Smart Support Socket is not designed to be removed and should be a tight fit. If it gets removed for whatever reason, make sure its put back in place as its vital for the support of the whole frame system.
9. We use grease on all joints to ensure smooth but rigid movement. Initially from time to time the grease may seep out to the surface of the wrist, ankle or elbow joint - if that happens then just blob it with some tissue.
Apparel and Compatibility
1. Mirai does not like the heat so don't put her out in the sun for prolonged periods and definitely do not leave her in the car or by a hot window sill.
2 Mirai was designed so that you can change her eyes and wig - both of which may come loose during transit but can be easily fixed. If this happens don't panic!
If her eyes come loose (unlikely but possible) then just remove the wig and then the headcap. Then you can push the eyes back into place.
3. The neck joint is just under 6mm wide meaning that you can fit any other doll head that has a larger neck socket. Some dolls however have very large neck socket - all you need to do is put a clear rubber tube over the neck joint - these are usually available at Tokyu Hands, DIY shop or an aquarium that sells those air tubes for the tank. Get one which is about 4mm wide.
4. Fatma Al Jassim has some photos comparing DD and SmartDoll on Facebook while Chun has photos covering compatibility with DD heads.
Hair Care
1. The wig fits around the head but I've kept it loose because many folks like to change the wigs - if you don't like your wig loose then you can use double sided tape or even blu-tac to keep the wig in place - I personally use blu-tac.
2. The braids are tied with some rubber bands but rubber bands inherently crack over time due to the nature of the material. Do what I do is go to a 100 yen shop (or equivalent in your neck of the woods) and get a box of small rubber bands to keep handy. I always carry some around with me in the event a rubber band snaps when I'm out n about with Mirai.
3. Always comb Mirai's hair from the bottom - combing from the top means that all you end up doing is tangling the hair at the bottom. You can use any comb for her hair - many folks do use a toothbrush - preferably one that does not have bits of spinach in it.
4. Mirai's wig should not be placed on her head symmetrically as I think it looks odd so I have the right side of the wig move forward which moves the parting line to the top left of her head - check out the photos in this post to see what I mean.
5. Mirai's beanie helps prevent her hair from getting ruffled when out n about but you may want to remove it from time to time - there is a way to remove the wig without ruffling her hair too much.
All you have to do is to place a finger on the top of her head and slowly roll up the edges of the beanie.
Safety
1. Mirai is not a toy but many young folks like her so I am going to recommend that this product is for ages 6 and up with parental guidance.
2. There are some parts some of which have pointy bits so please be careful not to injure yourself or anybody.
3. Mirai does not like to be eaten so don't put any part of her in your or anybody else's mouth - and don't let your friends do the same when you are not looking either as it is a choking hazard.
4. Mirai’s head and hair clip contains a magnet which may interfere with pacemakers - if this is the case then you need to remove the wig, open the soft head cap and then remove the magnet which is held in place with some convenient blu-tac.
5. Whatever you do - make sure you don't feed Mirai after midnight.
6. Mirai Smart Doll does not like being dipped in water so don't do it!

Just thought I'd add some maintenance tips with visuals. Most of you wont need any of this apart from the rubber bands.
Item 1. This is paint thinner that you can get at most hobby shops - it does absolutely wonders for removing dirt or marks from the skin and does not harm the surface either. Dip cotton buds in the thinner and dab the affected part of the skin.
Item 2. This is a spray that one would normally use on clothes to prevent static electricity and is also another wonder for the wig. If you find Mirai's wig getting tangled all the time, use some of this spray to untangle it.
Item 3. Make sure you use a clean tooth brush and not one with bits of carrot in it - always comb from the bottom of the hair and when thats untangled then start to comb from the middle. you can use any comb though.
Item 4. This is brush on super glue for folks who want the wrist or foot slide joint to be more rigid - simply remove the foot or hand and brush some onto the slide joint and leave to dry. What this does is to increase surface area of the slide joint thus making it tighter. Make sure its dry before sticking back into the slot though.
Item 5. This is the sold-separately Medium Bust. By default, the rosebuds are not colored.
Item 6: This is the sold-separately Large Bust. Some folks like the rosebuds to have some color - if that is you then you can use Item 7 which is an pink marker pen - just dab the rosebud directly with the marker and blot with tissue. Its up to you what color to use ^^;
Item 7: Pink Marker pen - available from stationeries etc.
Item 8: This is the sold-separately Large Bust. The rosebuds and collar areas have been given a more realistic tone of shading by chalk and finished off with some matte top coat.
Item 9. Blu-tac - its always good to keep handy - whether its to keep the wig in place or have Mirai hold oddly shaped stuff in her hands.
Item 10. Rubber tubing available from many DIY shops - you would only really need this if you are using other doll heads on the Smart Body.
Item 11. You need these! Got this pack of 200 rubber hands for hair at a 100 yen shop.


![]()
The above photos show the extent of the beauty marks that you may have on the body parts. They are located just under the skin and I only approve them when they look like beauty marks. If you don't like the look of them then you should not purchase Smart Doll.
Most of the bodies don't have them but I'm not going to sift through them to locate spotless ones at request ><

![]()
Fact - Mirai makes people happy - not only that but if you walk around with Mirai then I guarantee you that you will start to meet and make a ton of new happy friends just like I have.
I think I forgot to mention the real reason why this product is called "Smart Doll" - "SM" stands for "Social Media" and that is what I see Mirai as. Folks think of social media as being online websites such as Facebook and Twitter but as you can see from these photos - Mirai helps folks to connect with others and will be a major player in Social Media in the future.
Now the "ART" in smART" means just that - Mirai is a sculpture - a visual form of art which I created and will actually be displayed in art galleries starting this Summer - more news on this later.
So to summarize - Mirai is Social Media Art ^o^

I'm going to be straight with you and pull no punches!
![]()
I'm not doing this for the money - If all I wanted was money, it would be a much much wiser decision for me to not leave corporate life and remain as a salaryman at either Amazon as Website Manager or Microsoft as Product Manager where I was earning about 30,000,000 yen per year (300,000 USD at today's rate).
Remaining a salaryman also means that I can also...
- Sleep more than a couple of hours a day.
- Not have to worry about income and feeding my employees as I would have a steady paycheck.
- Have more time to spend with family.
- Have more time to spend on health instead of putting constant pressure on my Spinal Hernia.
- Spend time to relax on some beach - which I did manage to do from time to time as a salaryman.
- Finish work at 6PM - which I did when I was at both Amazon and Microsoft.
- Buy my dream car which is a Nissan Fairlady Z ^^;
You can read more reasons why money doesn't motivate me but If I was doing it for the money, I would pull wool over your eyes and only tell you that my product is fantastic and fantastic - I actually do think she's fantastic but as a consumer, I want you to know the cons about purchasing my own product too - which I will list with the Pro's as its traditionally done.
Cons
1. As this is the first doll that I have designed and manufactured, some folks may feel its a wiser decision to wait a few years to see upgraded bodies and features.
2. Being a new kid on the block with slightly different body proportions than the mainstream will mean that initially there is a lack of apparel items that fit. I am currently working on the new line of apparel now though.
3. While Smart Doll Manual Version is priced the same or less than other soft vinyl dolls on the market - she still costs more than a PS4 - could be better decision to wait until I can reduce my costs and improve production processes which means I will be able to pass on savings to the consumer.
4. Knees don't bend more than 90° - if you need to bend knees more than 90° seek other products instead. Most dolls knees split open when bent over 180° which I really didn't like.
5. Smart Doll has a hole in the back called the Smart Support Socket - many folks may not like this feature and if so should avoid purchasing.
6. As explained in the Maintenance section above, Smart Doll may from time to time have a 0.01 mm beauty mark on the body.
7. As explained in the Maintenance section above, Smart Doll may from time to time have a 0.02 mm air pocket (small round circle) on the surface of the body.
8. We only plan to make Culture Japan characters so the choice is currently limited.
9. The outer shell is thinner than other soft vinyl dolls - this is to create as much space as possible for the Automatic robotic version when she is finally released as the Manual and Automatic version use the same body. This means that the soft vinyl may be easily squished by tight clothing - this can be remedied by a hairdryer as mentioned in the Maintenance section above though.
10. We are still working out of my house and don't have any dust free environments so the box may have specs of dust from time to time ><
11. No replacements parts right now because I can't even meet up with the demand of Mirai ><
But I will do replacement parts later this year so you may want to wait if this concerns you.
Pros
1. Smart Support Socket means that Mirai can be displayed in an elevated pose with ease using the sold seperately Smart Air Stand.
2. Smart Support Socket also means that the telescopic stand that comes in the box provides extra support especially on uneven surfaces - ideal for taking photos outdoors even in windy situations.
3. Smart Support Socket provides a means of attaching accessories of many anime or game characters like Kancolle - great for when you want to customise your girl.
4. Slender body design in particular for the neck, arms and legs mean that apparel items look better.
5. Triple axis joints for the ankles and wrists means more articulation and freedom of posing expression.
6. Under-bust joint means no visible joint in middle of the waist.
7. We are focused on providing constant availability for regions outside of Japan first. Up until now doll manufacturers have been predominantly focused on the local Japanese market meaning that its difficult to get not only the dolls but also the accessories without paying higher prices on Yahoo Auction or going through a proxy. All Smart Dolls and accessories will first be made accessible to regions outside of Japan.
8. Folks who purchase a Smart Doll are kept on a mailing list and have first dibs before new products or accessories are launched to the public.
9. Smart Doll owners who proactively share their photos online at Twitter & Instagram using hashtag #SmartDoll #MiraiSuenaga will get Smart Doll accessory freebies sent from time to time ^^

For folks who like their girls with more Tsun
![]()
If you like your girls to be a bit more tsun + dere with a sprinkle of Ojo-sama then you may want to go for Smart Doll 002: Kizuna Yumeno instead who is due out towards the end of this year - could be sooner depending on how development of the facemasks, wig and apparel go.
This is a prototype photo and I won't be taking orders until I can show you what the final product will look like.

![]()
It's taken just over a year and a half since I started work on Mirai Smart Doll - that time frame would be considered short for a product of this complexity but at the same time I felt it took longer than I originally planned.
I have learned a lot about production processes of plastics, metals and cloth and shared the important stuff with you in the production section above in the hopes that it will encourage folks to make their own stuff.
Apart from my knowledge of the production processes, there is more that I feel is important to share with you.
Falling Hard
Smart Doll is my biggest life project so far and after 40 years on this planet I can tell you that the bigger your goals are, the bigger the hurdles are going to be and the harder you will fall.
Having not made anything like this before, there was a steep learning curve which in many cases involved trying things that often involved me tripping on one of those hurdles and falling flat on my face. Some would call this"failure" but I call this "learning" - nothing will always lead to nothing while something will always lead to something even though that something may seem like a failure.
Without failure, there is no learning and without learning, there would be no progress meaning that goals would not be reached. Don't be afraid of failure - be afraid of never reaching your goals.
Never give in
Another hurdle that I experienced is the constant disappointments of poor quality or just plain not-to-spec samples or product parts that come back from vendors. This can be very very depressing at times!
While I work with talented vendors, some of them have difficulty in working with the quality standards that I expect.
One has to grow very thick skin (thick enough to make siew yoke) by believing in what you are doing and not giving in when folks around you try to convince you otherwise - your goal is to make a quality product that encapsulates your vision - your goal here is not to make friends.
Telling talented vendors that their work is unacceptable is not an easy task and you will be hated "for being picky" but remember that once you give in, your product and vision dies there and then. Everybody else wins - you lose.
Then there are times when folks who are close to you will tell you otherwise - that "its good as it is" - that you are being too picky about nothing. If you give in and listen to them and find out that they are wrong afterwards you will end up blaming them.
The person you should blame in this case is yourself because it was you who listened to them in the first place.
Worrying
Many of us worry as it makes us feel like we are doing something about a problem when in fact we are wasting time being anxious about nothing. Making a judgement call on an aspect of design (could be the frame, outer shell etc) that has an unknown outcome is a decision that affects time and money and we humans naturally don't want to waste either of these precious resources and worry whether we are making the correct decision or not.
But if you start to think about any decision you make as being essential to progress, then its easier to make quicker decisions even though the outcome turns out not as expected.
The reason is that now you have that unexpected outcome, you have something to work on to make a judgement call so that you can at least progress towards your goal instead of standing still.
If you find yourself worrying about a decision to make then just make any decision as it will at least set you off towards your goal instead of leaving yourself standing still worrying about nothing.
A better way
Whatever you do - you must always question the workflows you put in place - you must always tell yourself "there just *has* to be a better way to do this."
Without this mentality, you will end up working with old clumsy workflows that will eventually start to tie you down and prevent you from reaching your goals.
Dont leave stuff as it is just because everything just works - always strive to make it better.
Timing
Many of us wait for "the right timing" because we think it will be "easier" - disappointed you may be when I tell you there is no right timing. There is no right timing especially when it comes to things like moving house, changing a job, having a baby, getting married or starting your life project.
If you have something you really want to do in life then that time is now - not next week, not next month and definitely not in the new year when you make that "new years resolution." A new years resolution is an excuse to put something off for another year - if you convinced yourself to wait until the new year to make that resolution then your goal is either not important or you will convince yourself to put it off again.
A life goal has to mean everything to you otherwise it means nothing to you and you will never ever reach it.
Revenge
The bigger your life project becomes, the more likely you are to come across people who get involved in your project and eventually stab your back.
Through the Smart Doll project I've had a few jabs to my back but the important thing was to move forward instead of spending time and resources to take a jab back - while very tempting, if you devote time to stabbing somebody back, it means that taking revenge has become more important and you will loose focus on your goal. It also means that the person who stabbed you has won because they got to stab you and also got you to give up on your goal.
Instead, use your anger and channel that into wanting to do everything to complete your goal sooner because the likelihood is that the person who you once worked with who stabbed your back will be watching your progress all the way and when you reach your goal then you have delivered the fatal blow - the humiliation of your backstabber watching you succeed.
This also applies to trolls on and offline. These days, I get trolled for anything and everything - does not really matter until the trolls start to tell malicious lies to gather recognition from their peers.
One of the reasons why trolls do what they do is because they do not have the ability to accomplish much in real life but gaining your attention gives them a sense of achievement.
Never ever react against a troll - instead of using your anger to counterattack with small clumsy uncalculated blows that will leave you feeling embarrassed afterwards, use your energy to aggressively continue to achieve your goals and live well.
I want my trolls to know that whenever I achieve my goals - this is what my face looks like when thinking of you. Please keep up the trolling - it really does me wonders.
Whining
Folks spend time whining about this and that and is something I used to do too - a complete waste of time that takes time and energy away from your project. Absolutely nothing that you whine about is worth even thinking about when compared to the problems that some folks face in the third world.
Sacrifice
Goals involve sacrifices. The bigger your goal, the bigger the sacrifice you are going to have to make. Its one or the other - not both.
There is a myth that working for yourself means that you have the freedom to work on what you want whenever you want and that you will have more time to do your own stuff - how wrong the myth could be.
Once you start to work for yourself you don't have a steady paycheck anymore meaning you need to constantly think about income and then doing the work that involves bringing that income. This means you have less time for yourself and find yourself choosing between:-
#Running and growing the business
#Spending time with family
#Spending time on health
If you are not willing or finding it difficult to sacrifice something in order to reach your goal then you are going to take a long time or never reach your destination.
I ended up sacrificing my health and am not in particular great shape. My spinal hernia has gotten worse over the years and I've had a chronic asthma related cough for the past 6 months.
But! I think it is all worth it when I look at the happy folks around Mirai.

It's not the money
Many folks blame the money - "I could do it if I had the cash" - this is the voice of somebody who can't be bothered and does not have any real goals.
A modern day example is the Evernote type service called Springpad - even though they had 7.3 million USD of funding - they could not create a sustainable business - this could be for a variety of reasons and I'm not going to speculate either but just wanted to get the point across to you that its not the money that counts - its you and your desires and passions that decides whether you succeed in reaching your life goals.
This photo is of me and some workmates when I was working part time in a Japanese restaurant called Benihana. I left my father's studio to pursue my dreams of living and working in Japan (which you read about here) - working here fulfilled two goals - not only did I get to speak Japanese to staff and customers, I also earned the cash that I needed to travel to Japan once a year to absorb the culture.
I also reached another unexpected goal while working there - I met my wife ^^
Unfortunately there are a load of folks out there of the I-could-do-it-if-I-had-the-cash variety who are not willing to work for the money - I guess they are too good to wash or carry dishes like I did.
The first thing that many startups do is seek funding but I see that as an act of not wanting to leave the comfort zone of a salaried job - this is evident by the flash offices these "startups" go and rent who start to fill it with expensive furniture and Macs for everyone - this does not sound like startup mentality to me.
Many successful startups tend to bootstrap their own business by initially using their own funds which are usually savings - in my case I bootstrapped my business through earnings at Amazon and Microsoft and over time through sales of Mirai Suenaga merchandise.
The good thing about using your own money to bootstrap your business is that you will be more frugal with the way cash is spent and learn how to innovate with scarce resources. Many companies who startup with millions of USD have abundant resources to play with so there is no need to innovate anymore. I guess this is one of the reasons why 90% of tech startups fail.
Humans do things based on necessity. If its not a requirement we tend not to do it because humans are by nature programmed to conserve energy - using energy to do something that is not a requirement goes against our programming.
If you was hungry you would go to the kitchen to look for food - if there is nothing in the cabinet or fridge then you would go out to get food. Eating is a necessity for us which is why we always make time to eat.
If you have a goal in life then you must make it a necessity - you must have a desire and a will to make it succeed - it is you that can and will make it happen - not the money.
Remember - its not the money - its you.

After a year and a half of development, Smart Doll 001: Mirai Suenaga Manual Version launched in June 2014. The next goal is to learn how to scale the business - space, people, workflows, cashflow, legal, global distribution and more.
I've not done this before but have an idea of how it should be done and will take steps knowing that some decisions will lead to an undesired outcome but that outcome will be essential to reach the next level.
There is a lot to do over the next 6 months and it is the desire to accomplish these tasks that gets me up each morning without the need of an alarm clock. It is this desire that makes me love not only Mondays but every single day of the week.
I am very proud of Mirai and I think you will love her. I do however consider Mirai as an iPhone 3GS in terms of maturity but my goal is to bring her up to the level of an iPhone 6 within a short timespan just like I have delivered her from scratch in just over a year and a half.
If you told me 20 years ago that I would be into 60cm tall dolls I would have probably given you an odd look at the time - but after discovering and ending up making my own line of them - I think that more and more people around the world will start to accept them - and then when the Automatic Version is released I get to turn on Skynet ^^
![]()

Smart Doll 001: Mirai Suenaga Manual Version released 2014/06
![]()
I was going to stick the shopping cart on this page but it didn't make sense to have folks reloading this whole page again and scrolling to the bottom - the cart lives here!

And if you are interested in following developments of Smart Doll then follow my social networks where I will post news on product developments, giveaways, owner photos and announce when pre-orders become available.
Facebook filters a lot of content though so if you want to catch everything then you need to like a few posts before they show up in your timeline.
No comments:
Post a Comment